Fiber Optic Internet Installation Guide: Steps for Installing Fiber Optic Cable

Fiber Internet Installation: Complete Guide to Fiber Optic Internet Installation at Home
In an age where high-speed, reliable internet is essential for daily life—whether for work, streaming, gaming, or communication—fiber optic internet has emerged as the gold standard. Offering lightning-fast speeds, minimal latency, and superior reliability, fiber broadband is a major upgrade over traditional copper and coaxial networks.
But how does fiber internet installation actually bring connectivity from a national backbone into your home? The process involves a combination of national infrastructure, local engineering, and property-level setup. In this guide, we’ll break down the fiber installation process from start to finish and explain key components such as fiber cabinets, flower pods, ducting, and ONT setup.
What Is Fiber Optic Internet?
Before diving into installation, it’s important to understand what fiber optic internet is. Unlike traditional broadband that relies on copper wires, fiber-optic networks use thin strands of glass or plastic to transmit data as pulses of light. This enables:
Higher bandwidth capacity
Faster speeds over long distances
Minimal signal degradation
Types of Fiber Internet Connections
FTTH (Fiber to the Home): Direct fiber connection from the provider to your home.
FTTC (Fiber to the Cabinet): Fiber reaches a nearby cabinet; the last leg uses copper wire.
FTTP (Fiber to the Premises): Similar to FTTH but may include business or multi-unit buildings.
This article focuses primarily on FTTH installation, which delivers the fastest, most reliable performance.
Step-by-Step Fiber Optic Internet Installation
Step 1: Planning and Surveying for Fiber Internet Installation
ISPs begin with detailed planning and site surveys to assess viability. Engineers map terrain, utility lines, roads, and obstacles like brooks or rivers. They identify:
Utility pole and underground duct availability
Obstructions (buildings, vegetation, water features)
Optimal spots for fiber cabinets and distribution points
If a brook runs through a neighborhood, ISPs may bore under the water or install overhead fiber optic cable to avoid ecosystem disruption.
Step 2: Core Network and Fiber Cabinet Installation
Next, core fiber lines are extended closer to residential areas. This step involves:
Installing fiber optic cable along roads and utility paths
Installing large fiber cabinets that act as distribution hubs
Inside these weatherproof cabinets, fiber splitters divide the signal for multiple homes, connecting the backbone to local flower pods.
Step 3: Flower Pod Installation for Fiber Optic Internet Services
A flower pod, also called a fiber distribution point or node, connects several homes to a cabinet. Typically installed underground or in above-ground boxes, they work by:
Receiving a single fiber line from the cabinet
Splitting it into multiple property connections
Routing connections via ducts or micro-ducts
These pods are strategically placed to minimize digging and speed up installation.
Step 4: Ducting and Civil Works for Installing Fiber Optic Cable
To carry fiber from the flower pod to individual properties, ISPs install ducts. Methods include:
Underground ducting: Micro-ducts placed using directional drilling (ideal for crossing roads or brooks).
Overhead cabling: Installing fiber optic cable on utility poles.
Trenching: Narrow trenches for ducts, common in new builds.
When natural barriers like brooks exist, engineers may bore underneath or suspend aerial fiber.
Step 5: Installing the Fiber Drop Cable to Your Home
The fiber drop cable is the final connection from the flower pod to your home. It is pulled or blown through ducts to an external termination box (Customer Splice Point / ETB). From here, the fiber is ready to enter your property and complete fiber internet installation.
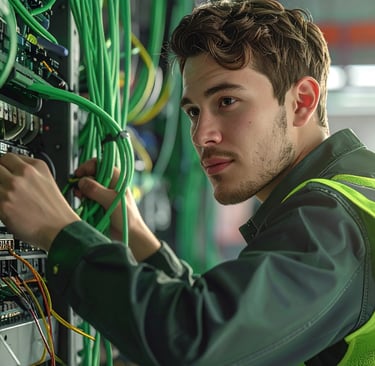
Step 6: Internal Installation and ONT Setup
Inside your home, a technician completes the installation by:
Running fiber from the ETB to a central location
Installing an Optical Network Terminal (ONT) to convert light signals into Ethernet
Connecting the ONT to your router
Testing signal strength and speed
This step ensures that your fiber optic internet services are fully optimized for performance.
Step 7: Testing and Activation of Fiber Optic Internet
Final checks include:
Signal strength measurements
Speed tests using ISP-approved tools
Fiber line quality verification
Once confirmed, your fiber broadband connection is activated, giving you access to gigabit-speed fiber optic internet.
Special Considerations for Installing Fiber Optic Cable
Navigating Natural Features Like Brooks
Crossing brooks and waterways may require:
Environmental impact assessments
Trenchless drilling to bore underneath
Aerial cable spans if allowed
Property Types and Access
Detached homes: Typically straightforward.
Apartments/condos: Require building-wide fiber planning.
Historic properties: May need permits or special methods.
Weather and Terrain
Soil type, terrain, and climate can affect installation timelines. For instance, rocky or frozen ground may require specialized equipment.
Choosing Fiber Optic Service Providers
Not all ISPs offer the same level of quality. When comparing fiber optic service providers, look for:
Availability of fiber optic internet services in your area
Transparent pricing and contract terms
Speed tiers that meet your household needs
Reliability and customer support ratings
Doing proper research ensures that your investment in fiber optic internet installation delivers maximum value.
Conclusion: Why Fiber Installation Matters
The fiber installation process may be complex, but the result is worth it: the fastest, most reliable internet connection available today. From backbone cables and fiber cabinets to flower pods and ONT setup, every stage ensures that fiber can support modern needs like remote work, 4K streaming, online gaming, and smart homes.
If you’re considering upgrading, check with local fiber optic service providers to see if fiber optic internet services are available in your area. With careful planning and precise engineering, you could soon enjoy the unmatched benefits of fiber optic internet.
Fiber Internet Installation FAQs
1. How long does fiber optic internet installation take?
Most fiber optic internet installation jobs take 2–4 hours. Larger properties or complex wiring may extend the timeline, but in most cases, you’ll be online the same day.
2. Do I need to prepare my home for installing fiber optic cable?
Yes. Clear access points like driveways, yards, and walls where technicians may run lines. If trenching is required, fiber optic service providers will notify you in advance.
3. What equipment is needed for fiber optic internet services?
You’ll need an ONT (Optical Network Terminal) and a compatible router or mesh system. These are usually provided by your fiber optic service provider during the fiber installation process.
4. Is fiber optic internet better than cable internet?
Yes. Fiber optic internet offers faster speeds, lower latency, and better reliability compared to cable. It’s also future-proof for higher bandwidth needs.
5. How much does fiber internet installation cost?
Costs vary by provider. Some fiber optic service providers offer free installation, while others charge $50–$200 depending on the work involved. Always ask about promotional offers.
6. Can I choose my fiber optic service providers?
It depends on your area. Multiple fiber optic internet services may be available in cities, while rural areas may only have one provider option.